Golf Cart Aluminum Gas Tank

Why such a nice gas tank for a golf cart? Because it has a 3 wheeler motor in it with a clutchless 5 speed, can do 50mph and I like cool!
2013-07-22 22.51.06  Cutting the tank pieces from some small scraps of 1/8" aluminum.
1 Cutting the tank pieces from some small scraps of 1/8" aluminum.
2013-07-22 22.50.58  Starting the welding.
2 Starting the welding.
2013-09-06 20.16.51  Machining a pickup tube, vent and return bung plate.
3 Machining a pickup tube, vent and return bung plate.
2013-09-06 20.53.17  Machining a pickup tube, vent and return bung plate.
4 Machining a pickup tube, vent and return bung plate.
2013-09-06 21.01.18  Machining a pickup tube, vent and return bung plate.
5 Machining a pickup tube, vent and return bung plate.
IMG 1686  Pickup tube, bent and return bung plate done.  One fitting gets swapped out for a vent.
6 Pickup tube, bent and return bung plate done. One fitting gets swapped out for a vent.
IMG 1687  Pickup tube, bent and return bung plate done.  One fitting gets swapped out for a vent.
7 Pickup tube, bent and return bung plate done. One fitting gets swapped out for a vent.
IMG 1688  Pickup tube, bent and return bung plate done.  One fitting gets swapped out for a vent.
8 Pickup tube, bent and return bung plate done. One fitting gets swapped out for a vent.
2013-09-25 20.18.17  Drawings for machining the unnecessarily nice fuel cap.
9 Drawings for machining the unnecessarily nice fuel cap.
2013-09-25 20.18.23  Turning down for the threads.
10 Turning down for the threads.
2013-09-25 20.34.34  Turning down for the threads.
11 Turning down for the threads.
2013-09-25 22.19.38  Cap threaded, now making the bung.
12 Cap threaded, now making the bung.
2013-09-25 23.30.01  Ensuring a good loose fit.
13 Ensuring a good loose fit.
2013-09-25 23.32.11  Ensuring a good loose fit.
14 Ensuring a good loose fit.
2013-10-12 21.39.34  Machining an Oring groove with pinch points to hold the Oring in the back side of the cap for sealing.
15 Machining an Oring groove with pinch points to hold the Oring in the back side of the cap for sealing.
2013-10-14 20.13.22  Preparing to machine the top of the cap.
16 Preparing to machine the top of the cap.
2013-10-23 19.26.09  Preparing to machine the top of the cap.
17 Preparing to machine the top of the cap.
2013-10-23 19.35.19  First operation done on the top.
18 First operation done on the top.
2013-10-23 20.20.42  A couple more ops done.
19 A couple more ops done.
2013-10-23 20.43.36  Chamfering.
20 Chamfering.
2013-10-23 20.47.48  Adding some engraving.
21 Adding some engraving.
IMG 1696  All done with the cap!  I like it!
22 All done with the cap! I like it!
IMG 1697  All done with the cap!  I like it!
23 All done with the cap! I like it!
IMG 1698  All done with the cap!  I like it!
24 All done with the cap! I like it!
IMG 1699  All done with this little benchtop G0704 Grizzly Mill converted to CNC operation and a touch screen for ease of use.
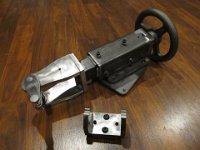
25 All done with this little benchtop G0704 Grizzly Mill converted to CNC operation and a touch screen for ease of use.
2013-10-24 19.28.38  Machining some threaded bungs for a tube style fuel gauge.
26 Machining some threaded bungs for a tube style fuel gauge.
2013-10-24 19.35.26  Machining some threaded bungs for a tube style fuel gauge.
27 Machining some threaded bungs for a tube style fuel gauge.
2013-10-24 19.50.17  Bungs setting in place and gas gauge awaiting installation.
28 Bungs setting in place and gas gauge awaiting installation.
2013-10-24 19.50.29  Bungs setting in place and gas gauge awaiting installation.
29 Bungs setting in place and gas gauge awaiting installation.
2013-10-31 08.22.41  Plugging all ports and pressure testing the tank.
30 Plugging all ports and pressure testing the tank.
2013-11-02 16.40.57  Soldering the pickup tube to the fitting.
31 Soldering the pickup tube to the fitting.
2013-11-02 17.02.28  Tank completed!  The wedge in the front is to help with airflow coming in the front wheelwell and under the chassis, to direct it over to the engine, as it is an air cooled motor.
32 Tank completed! The wedge in the front is to help with airflow coming in the front wheelwell and under the chassis, to direct it over to the engine, as it is an air cooled motor.
2013-11-02 17.02.37  Tank completed!  The wedge in the front is to help with airflow coming in the front wheelwell and under the chassis, to direct it over to the engine, as it is an air cooled motor.
33 Tank completed! The wedge in the front is to help with airflow coming in the front wheelwell and under the chassis, to direct it over to the engine, as it is an air cooled motor.